Ford 4600

I think I know where it came out, I think the gearbox overflowed! there's a stain down the side from where the gearbox top cover attaches.

My bigger concern is where did it get in. The last job the tractor did was spreading fert on a pretty hot day, so lots of driving and the PTO going too. If the back end got hot and a breather was blocked could it have blown an oil seal between axle and box?

pushing oil forward and out a joint that wouldnt normally be subject to pressure?

Tis only a theory, but it's about the only theory I've got right now.

some research is needed methinks.
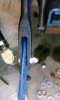
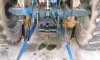
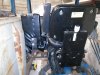
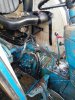
Is the gearbox seperate to the hydraulic on them, any possibility the returns from your loader are pressurising something?
 
They're supposed to be seperate alright. Loader return is going back into the back end through the top cover.

so it shouldnt be introducing any pressure as it's a closed system. the only thing I can think of that would pressurise the back end would be heat?
 
it's not pressure as such, it's heat I'd be thinking. the top half of the back axle is full of air. if air gets hot it expands. the expanding air is supposed to escape through the breather, if it's got nowhere to breath it could push the oil out through a seal somewhere. it's the only thing I can think of right now.
 
Latest area of focus has been the linkage.

The adjuster in the right hand drop link was barely adjustable with no load and unusable with weight on, there was a whole lot of slop in some of the pins, visible wear in some oval holes and I really hate check chains.


The adjuster assembly had clearly been replaced before as all it's pin holes were round! but the gearbox was bone dry and the bearing had seized. the gear was a bit worn too so it and the bearing were replaced, the whole thing packed with grease and a new nipple fitted.

The left hand drop link was clearly original. Seized solid and with some very oval shaped holes the only real option was replacement.

I got some cheap telecsopic stabilisers, but the mounting bolt to the arm was M24. No biggie, I have a mag drill. Ehhh, not happening at all. I marked it but there was no way it was going to drill it, I was able to pull hard on the handle and make the magnet start to lift off, but no way was that arm giving up.

So plan B was to cut the threaded portion off and weld in a 3/4 inch bolt that would fit through the existing holes. I cut into the D part to give me lots of land for the weld, used 7018 rods which was a challenge at times running the current low enough to not undercut, but high enough to give an easy strike without sticking in a small weld area.

All bolted up and tried out, makes hooking onto implements where the arm is contained on both sides simple.


It's still pissing oil everywhere, defintely flowing from back end into the gearbox, but I wont be doing anything with it till the winter time when I'll need to split it, possibly at both sides of the box as the oil seems to be coming the whole way through the gearbox and out the bellhousing.
 

Attachments

  • 1ab9aa6604722026fee7050a54ba39370d646ba5.jpg
    1ab9aa6604722026fee7050a54ba39370d646ba5.jpg
    190.6 KB · Views: 131
  • IMG_20150815_124834.jpg
    IMG_20150815_124834.jpg
    92.1 KB · Views: 133
  • IMG_20150815_131427.jpg
    IMG_20150815_131427.jpg
    69 KB · Views: 138
  • IMG_20150815_143110.jpg
    IMG_20150815_143110.jpg
    101.3 KB · Views: 150
Could someone with a ford cab do me a favour......


I want to measure the curved bar across the top of the windscreen in a ford safety cab.

part six in the pic. if you pulled a tape straight across the curve how big is it?

(the red line in my pic)


The tractor is 60 miles away :no:


thanking you in advance
 

Attachments

  • cabmeasure.jpg
    cabmeasure.jpg
    20.6 KB · Views: 77
Could someone with a ford cab do me a favour......


I want to measure the curved bar across the top of the windscreen in a ford safety cab.

part six in the pic. if you pulled a tape straight across the curve how big is it?

(the red line in my pic)


The tractor is 60 miles away :no:


thanking you in advance

As near as I can measure it , 180 mm. It's a little hard to be really accurate , with the roof on it. The lip at the bottom is 25 mm. Made from 6 mm , I would say. [MENTION=2707]JohnBoy[/MENTION].
 
As near as I can measure it , 180 mm. It's a little hard to be really accurate , with the roof on it. The lip at the bottom is 25 mm. Made from 6 mm , I would say. [MENTION=2707]JohnBoy[/MENTION].
Thank you kindly sir!!!
 
http://www.forum4farming.com/forum/...itches-versus-linkage-hooks.7697/#post-214840

Let's call a spade a spade, I start a lot of threads asking questions about ideas I've had that never seem to go anywhere. That's partially because I've way more time to be thinking about things than actually doing them, partly cos I haven't won the lotto yet and partly because I'm a dreamer.


So three years after asking about em and nearly a year since picking up a cheap set of hooks off ebay I finally got round to fitting my hooks tonight. Burned half a pack of 7018 into them and added some fillets underneath as I thought they didn't look overly meaty as the original arms taper down at the ends.

Looking forward to trying them out at the weekend. Putting the weight on and off is a fair battle at the moment

View attachment 35918 View attachment 35918 View attachment 35919 View attachment 35918 View attachment 35919

Right job there John Boy. Throw up a few pics of the tractor when you have them fitted :Thumbp2:
 
Finished the lights this evening, well happy with how it all worked out.

There's a slight difference let's just say
 

Attachments

  • IMG_20161126_162140.jpg
    IMG_20161126_162140.jpg
    175.7 KB · Views: 129
  • IMG_20161126_162254.jpg
    IMG_20161126_162254.jpg
    151.7 KB · Views: 122
  • IMG_20161126_162047.jpg
    IMG_20161126_162047.jpg
    101.5 KB · Views: 123
  • IMG_20161126_182407.jpg
    IMG_20161126_182407.jpg
    113.6 KB · Views: 117
  • IMG_20161126_182454.jpg
    IMG_20161126_182454.jpg
    57.2 KB · Views: 117
  • IMG_20161126_182637.jpg
    IMG_20161126_182637.jpg
    82.4 KB · Views: 124
Another small electrical job sorted. When the mechanic rewired the tractor he fitted a cheap flasher switch which fell apart, leaving me with the right hand indicator going every time the tractor was running.

Picked up this hella combined switch and flasher unit, but there wasn't enough room between the dashboard and the fuel tank so I had to run cables between them. You'd swear it was made for the hole, a few runs of a file and it fit like a glove in the original opening.
 

Attachments

  • IMG_20170113_213658.jpg
    IMG_20170113_213658.jpg
    235.4 KB · Views: 93
  • IMG-20170113-WA0004.jpeg
    IMG-20170113-WA0004.jpeg
    130.9 KB · Views: 85
  • IMG_20170113_221213.jpg
    IMG_20170113_221213.jpg
    237.5 KB · Views: 87
  • IMG_20170113_221209_01.jpg
    IMG_20170113_221209_01.jpg
    223.6 KB · Views: 90
Another thing this old tractor would never have had is a passenger seat. There is zero safe way to carry one of the kids on board.

I've been wanting to see if I could do anything about it, did a bunch of looking online and saw some interesting seats in the states that are basically just fillers between the seat and the wing.

This weekend I had a few hours,a pile of offcuts and the blackboard.

Came up with a ridiculously overengineered seat frame that sits between the wing and top cover.

Needs a small bit more fabrication but it's pretty much done. I've a new driver's seat on the way with fold up arms and some foam and leatherette for the base, plus the obligatory seatbelt.

One of those things that technically doesn't need to be done,but I enjoyed the fabrication and it'll be great to be able to safely carry a child
 

Attachments

  • IMG_20170212_121643.jpg
    IMG_20170212_121643.jpg
    131.5 KB · Views: 90
  • IMG_20170212_121658.jpg
    IMG_20170212_121658.jpg
    176.1 KB · Views: 88
Bit more progress

Did a test fitting of the new seat to take some final measurements. Extended the base as the new seat has a bigger footprint

Mocked up the passenger base and got a man to test it. One layer of cow mat and four of foam.
 

Attachments

  • IMG_20170305_123139.jpg
    IMG_20170305_123139.jpg
    149.7 KB · Views: 89
  • IMG_20170305_123102.jpg
    IMG_20170305_123102.jpg
    185 KB · Views: 86
  • IMG_20170304_203220.jpg
    IMG_20170304_203220.jpg
    162.3 KB · Views: 84
Bit more progress

Did a test fitting of the new seat to take some final measurements. Extended the base as the new seat has a bigger footprint

Mocked up the passenger base and got a man to test it. One layer of cow mat and four of foam.

One thing to watch is his fingers...your seat will bounce up and down...his won't and his fingers might get squeeze/caught between the two...?
 
Well bollix anyway

Pushed the log splitter against the relief valve and the tipping pipe outlet stripped it's thread and made a fountain
 

Attachments

  • IMG_20170514_101149.jpg
    IMG_20170514_101149.jpg
    222.1 KB · Views: 91
Back
Top