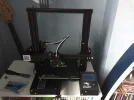
My son inlaw has printed parts for cars from files that someone else had drawn up . He has done railway buildings for the family’s model railway setup. I think he uses cornstarch based materials.Ive printed lots of things for the printer itself, tool holders and brackets, toys and games for the toddler, lots of accessories and track for his train sets. Made a handle to take off the sprayer nozzles easily, and a spike for a diy grain probe.
View attachment 169443
Currently printing a clamp to hang up extension leads.

You are using an out of date browser. It may not display this or other websites correctly.
You should upgrade or use an alternative browser.
You should upgrade or use an alternative browser.
What are you up to in the workshop?
- Thread starter BasilSeal
- Start date


drew
Well-Known Member
The ones here dad got a goal post welded over the top of them, just pick it up with whatever fork is on the loaderView attachment 169480
Got this put on today. I never liked going in between the back wheel and the feeder to put on the top link.

1Farmer1
Well-Known Member
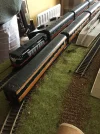
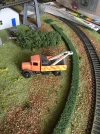
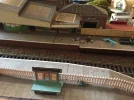
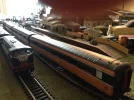
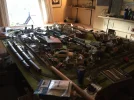
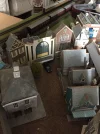
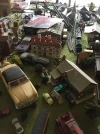
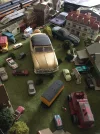
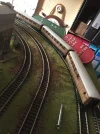
any pics/ vids of familys model railway set up, Its a hobby I would love to have.........My son inlaw has printed parts for cars from files that someone else had drawn up . He has done railway buildings for the family’s model railway setup. I think he uses cornstarch based materials.
Three generations of the family have been involved with the models and it was being reengineered when I took the photos.any pics/ vids of familys model railway set up, Its a hobby I would love to have.........
Attachments
-
 IMG_7304.webp204.7 KB · Views: 60
 -
 IMG_7310.webp287.8 KB · Views: 57
 -
 IMG_7316.webp143.1 KB · Views: 58
 -
 IMG_7317.webp95.1 KB · Views: 61
 -
 IMG_7320.webp138.6 KB · Views: 60
 -
 IMG_7309.webp145.1 KB · Views: 58
 -
 IMG_7308.webp159.1 KB · Views: 55
 -
 IMG_7307.webp150.7 KB · Views: 53
 -
 IMG_7305.webp135.2 KB · Views: 60

Farmer Murph
Well-Known Member
First time using a wiring junction box. It’s for the side marker lights and led work lights on my front sprayer tank project. Using a Sparex heavy duty box given what it’s going on.
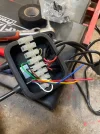
A lot quicker and easier than trying to splice wires, and should protect the connections in the event of any spills. As with any wiring, always nice to see everything light up when you test it, and not have to chase back.
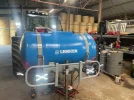
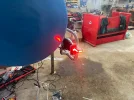
A lot quicker and easier than trying to splice wires, and should protect the connections in the event of any spills. As with any wiring, always nice to see everything light up when you test it, and not have to chase back.
Last edited:

Jay Dee
Well-Known Member
I would have 1 on nearly everything, latest baler got 2 I think, also easier to trace a problem later on if needs be.First time using a wiring junction box. It’s for the side market lights and led work lights on my front sprayer tank project. Using a Sparex heavy duty box given what it’s going on.
View attachment 169604
A lot quicker and easier than trying to splice wires, and should protect the connections in the event of any spills. As with any wiring, always nice to see everything light up when you test it, and not have to chase back.
View attachment 169602View attachment 169603

bk1991
Well-Known Member
I would have 1 on nearly everything, latest baler got 2 I think, also easier to trace a problem later on if needs be.
I’ve noticed the rubber ones with the clear cover always nearly let in water or let corrosion happen. The ones that have a screw on cover and the glands that you can tighten are a better job to keep out any moisture. But any junctions box and being able to divide up lights makes massive difference in fault finding.

Cjmc
Well-Known Member
Agree with you there, any wiring job on trailers or anything I have done for the last couple of years I’ve used proper IP rated junction boxes and glands, much better job, the water always finds its way in with the rubbolite type boxes.I’ve noticed the rubber ones with the clear cover always nearly let in water or let corrosion happen. The ones that have a screw on cover and the glands that you can tighten are a better job to keep out any moisture. But any junctions box and being able to divide up lights makes massive difference in fault finding.

Timber tec on tictok has some good videos on them.Agree with you there, any wiring job on trailers or anything I have done for the last couple of years I’ve used proper IP rated junction boxes and glands, much better job, the water always finds its way in with the rubbolite type boxes.
gooey_oleary
Well-Known Member
They are cheaper aswell.....i redid the lamps on back of sheepbox,after dog eat the lead off....not a sign of rust or corrosion inside it after 15 years underneath the trailerAgree with you there, any wiring job on trailers or anything I have done for the last couple of years I’ve used proper IP rated junction boxes and glands, much better job, the water always finds its way in with the rubbolite type boxes.
Cjmc
Well-Known Member
Ya I use them too, great job..Use wago connectors inside box a lot faster

massey 6480
Well-Known Member
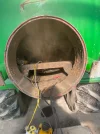
Prepping inside for a bit of leak prevention

Deerehunter
Well-Known Member
WIll the 3rd photo be of you standing by an army tank?Prepping inside for a bit of leak prevention
View attachment 169661
massey 6480
Well-Known Member
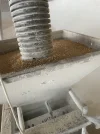
This is what I’m currently standing along side
WIll the 3rd photo be of you standing by an army tank?
Deerehunter
Well-Known Member
Hows the mill going?This is what I’m currently standing along side
View attachment 169664
massey 6480
Well-Known Member
Going well yeah well impressed with it . Good output and leaving a lovely sample after it .
Hows the mill going?

Tekscrew
Well-Known Member
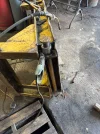
Had to take ramp off low loader and make new plate surrounding bushing. All back together and did a share of wiring too to tidy it up.
Fitted number plate and mudflaps.
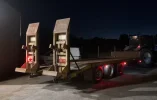
Made 2 new ramp bars and 2 new pins welded on for holding them.
Fitted new valve for ramps. It was piped direct to spool.
Went to electrical store and got 4-8mm glands and asked for an IP66 junction box. Brought it home and it was ip65 with no seal at all on the cover. Going to go elsewhere and get an ip66 junction box.
Have taken a hose off the full length and got new fitting crimped on and done lots of grinding and welding bits and pieces on it.
2 plastic crates fit nicely in the toolbox. As good as slide out drawers.
Brakes are good thankfully.
Still to do:
One brake ram is weeping. Must replace that.
Need to make a crash bar on road side.
Going to wire strobes in middle between ramps if unloading on a road.
Going to put light in the toolbox
Must take off drawbar and shim the sides of it. Weld on drawbar spring locators to trailer side. Weld on new eye to drawbar.
Crack along headboard to weld.
Going to flip it eventually and weld on lots more strapping points.
Last edited:

Agri-Eng
Well-Known Member
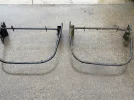
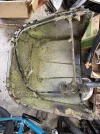
Were the required parts readily available and also affordable?Grass box top frame reppacement after tipping handle got stuck in an ESB staywire last week. The offending driver had to mow everything with the walk behind yesterday.
View attachment 169679View attachment 169680
View attachment 169681View attachment 169682
I have heard of people trying to source some parts for their ride on mowers, but they were asked outrageous money for same.
They were available luckily. Ordered Tuesday and arrived yesterday. Its a Solo. €95 for all the bits. The tube was too badly kinked to try and repair it which was annoying.Were the required parts readily available and also affordable?
I have heard of people trying to source some parts for their ride on mowers, but they were asked outrageous money for same.
CGT stuff can be colossal money.